Origami Mini Birthday Cake Easy Step by Step
A little while ago whilst scrolling through Pinterest looking at different crafting and cake photos I got onto the theme of origami. I'm not sure how I got onto origami but I saw an image of an origami cake and immediately knew I had to try it (let me know in the comments if like me you can loose hours just scrolling through photos on Pinterest).
Over the last few weeks I have made this cake quite a few times, testing out the best way to add this design around the side of my cake and testing out what to use to get the best finish. I'm so excited to share this weeks video tutorial with you showing how I made it.
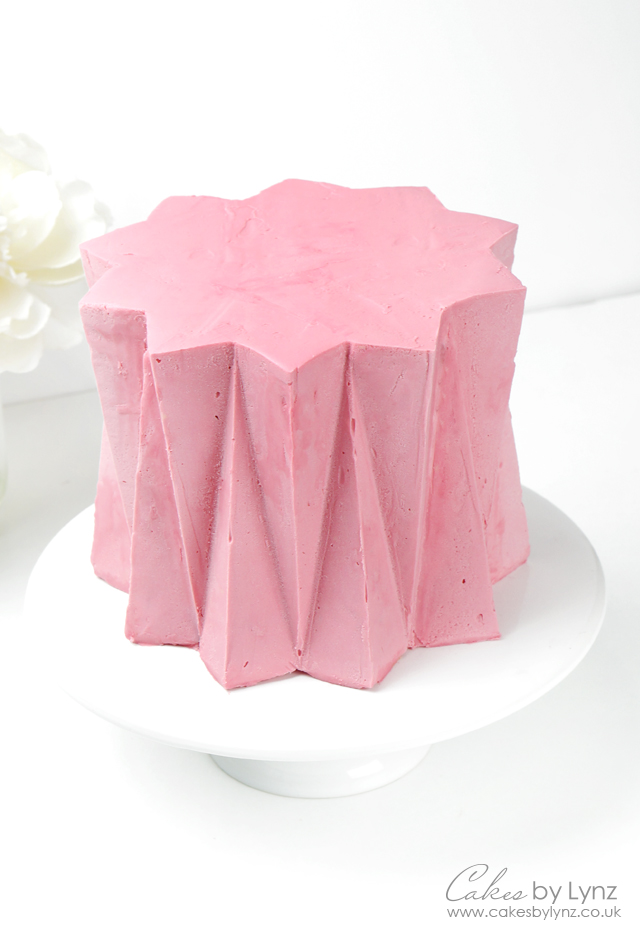
The cake I used in this tutorial is a 5 inch sponge cake, 4 layers high, measuring 5 inches in height. One of the first things to think about when making this cake is the overall size of the finished cake. The origami design around the edge made this cake just over 6.5 inches in width, so this is something to take into consideration, especially if you are going to be adding this effect into a tiered cake.
Using Ganache
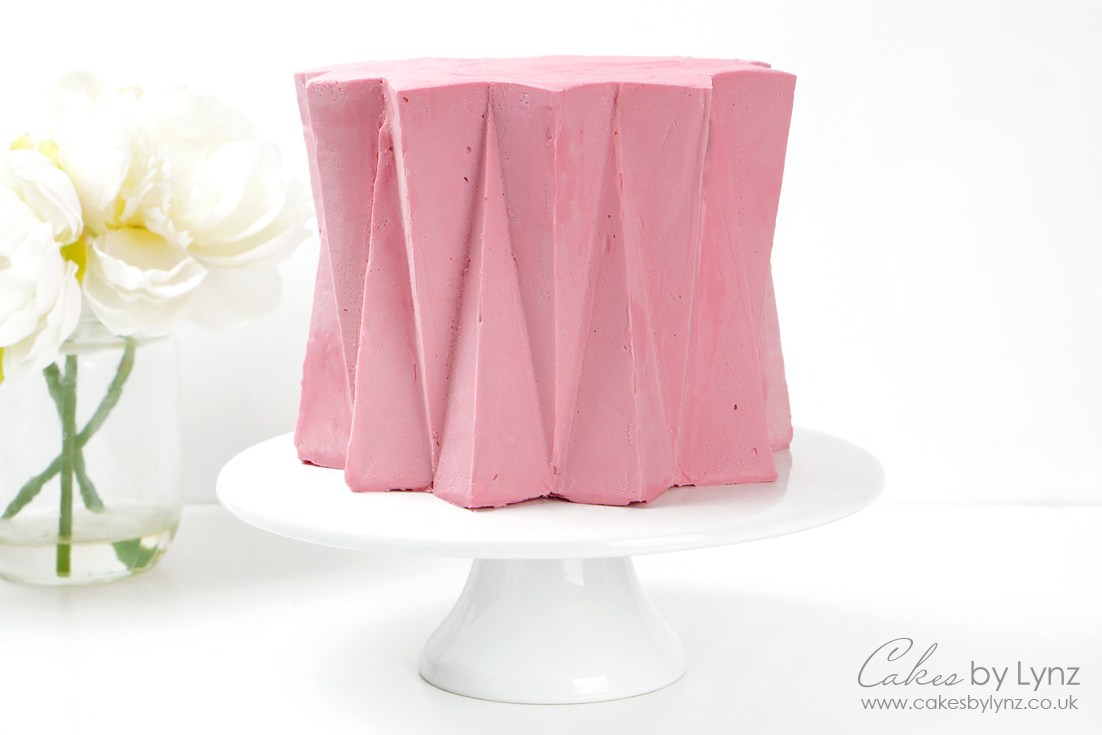
For this cake I used white chocolate ganache (find my recipe here) and coloured it pink using the Colour Mill Raspberry with a hint of rose. You will see that in the tutorial I actually whipped my ganache, which made it so easy to pipe into my template as the texture was similar to that of buttercream. But as the chocolate allows the ganache to firm up it gave a better finish when the template was removed. When I first made this cake I used buttercream, now you can use buttercream, but I found when you pealed off the template from around the edge buttercream was always left on the parchment paper and it just didn't look as neat as I wanted.
Once the template was removed I did have to fill a few holes and smooth a few of the panels, but overall I was so pleased with how this cake looks. It makes such a striking design and I have seen photos of people folding their templates in different ways which always gives such a different and unique finish.
The Template
In the tutorial you will see that the template is made by folding thick paper or a thin card to create the design. The card I used was around 170 – 180 gsm, so the template would hold its shape under the weight of the ganache. I did try it with a thinner paper (120gsm) and found that the template would collapse and not hold it's shape, so definitely a thin card worked better. I then covered my card in a layer of parchment paper, fixing this into place with some double sided tape. This helped me remove the template from my ganache and also made it a little more food safe, as you were applying the ganache to the parchment paper rather than onto the card. You could also use kitchen wax paper which is similar to parchment paper.
For the template I actually created 4 separate panels, this allowed me to take time on each panel and hold it in my hand to better keep it's shape as I smoothed out the ganache. It also meant I only had a small panel to lift into place each time. For me I found this worked really well. The first time I created a template I created one long piece and wrapped the whole thing around the cake in one go, it was so messy and a template with that much ganache just lost its shape. It wanted to open out, so using smaller panels gave me so much more control.
I think this cake looks amazing whether its kept simple, maybe with a cake topper added or even as part of a stacked wedding cake. I think this would look amazing with a simple 4 inch tier on the top and a 9 inch tier on the bottom. I really hope you enjoy the tutorial and will be able to use this technique on one of your own cakes. Let me know in the comments if you try it?
Plus if you haven't already you can subscribe to my YouTube channel for more Free cake decorating video tutorials.
Tools I used
I have put a list below showing all the tools that I used throughout this video or if you would like to see all my favourite cake decorating tools just click here: https://www.amazon.co.uk/shop/cakesbylynz
Piping bags I use: http://amzn.to/2xqeDlM
Offset spatula (small): https://amzn.to/2yD7btn
Colour Mill Rose: https://tidd.ly/2V2T8sj
Colour Mill Raspberry: https://tidd.ly/2V2T8sj
Turntable: https://amzn.to/35u3QJB
PME Cake Smoother 10inch: https://amzn.to/35pYiRm
Double Sided Tape (similar): https://amzn.to/3qzSVqW
Double Sided Tape Wheel: https://amzn.to/3dtSVVN
~ Please note that some of links above may be affiliate links. If you click the link and purchase any item through that link, I will receive a small commission from the website but this does NOT add any additional costs to you. Thank you so much for supporting this blog x ~
Plus why not save this tutorial for later and pin it to Pinterest

Thanks for reading!

Origami Mini Birthday Cake Easy Step by Step
Source: https://www.cakesbylynz.co.uk/index.php/2021/02/origami-ganache-cake-tutorial/
0 Response to "Origami Mini Birthday Cake Easy Step by Step"
Post a Comment